Using Connect-MicrosoftTeams in Powershell

When working with Microsoft Teams through PowerShell, the first thing you need to do is connect to your Teams environment. The Connect-MicrosoftTeams cmdlet is the key to establishing that connection.
Without it, you can’t manage users, configure settings, or perform any administrative tasks within Teams using PowerShell.
Understanding how to use Connect-MicrosoftTeams properly is crucial for managing Teams efficiently and effectively, and that’s what we’ll do today.
What is the Connect-MicrosoftTeams Cmdlet in PowerShell?
The Connect-MicrosoftTeams cmdlet is a command that establishes a connection between PowerShell and Microsoft Teams. It authenticates your session using your Microsoft 365 credentials, allowing you to manage Teams settings, users, policies and more through PowerShell commands.
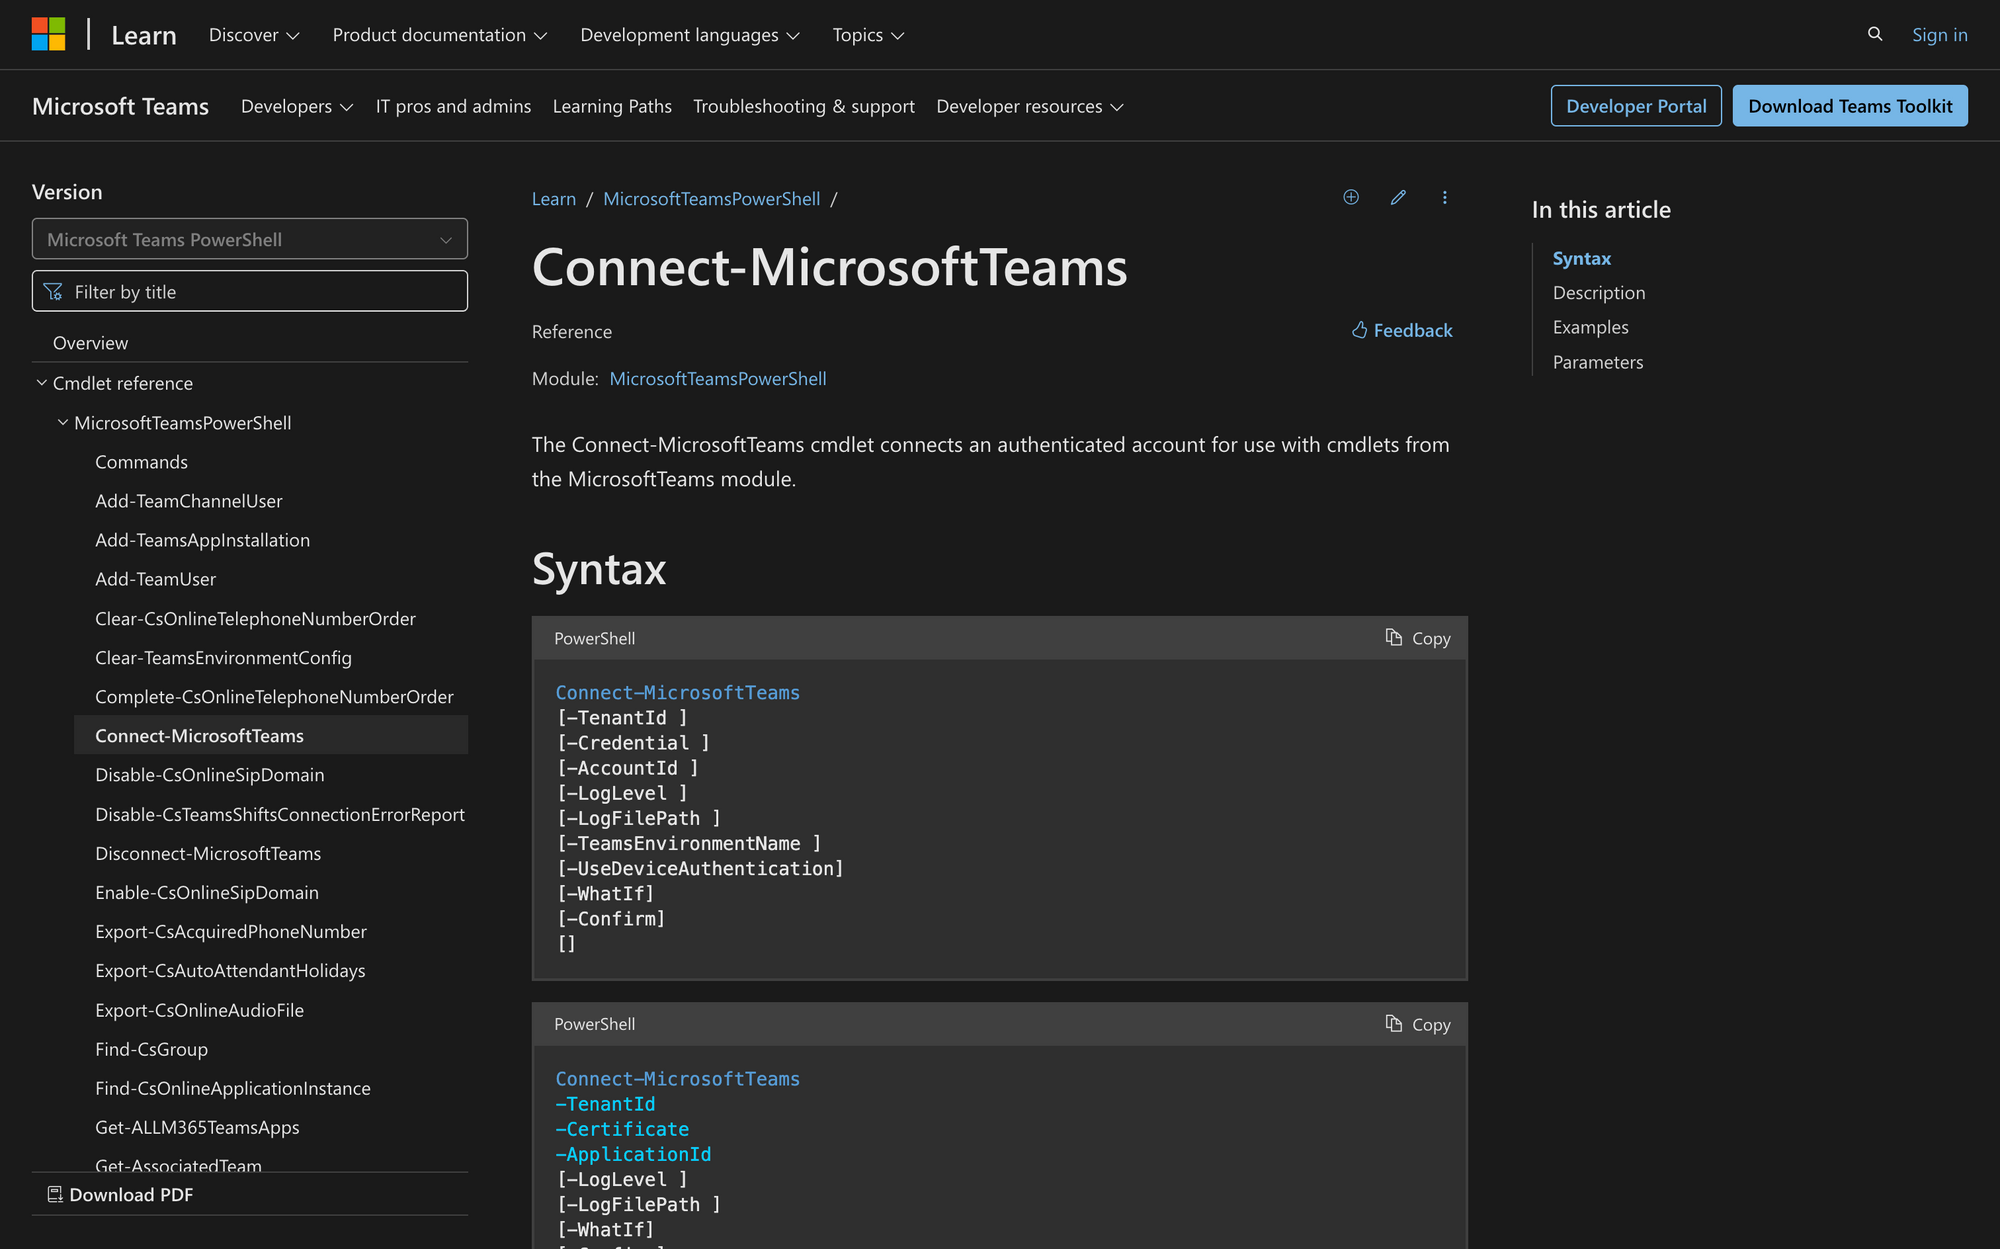
Here’s the syntax for Connect-MicrosoftTeams, along with a short explanation for each parameter:
- [-TenantId]: Specifies the unique identifier for the tenant you're connecting to.
- [-Credential]: Allows you to provide custom credentials (username and password) for authentication.
- [-AccountId]: Specifies the user account ID used for signing into the Microsoft Teams service.
- [-LogLevel]: Defines the level of logging verbosity for troubleshooting and diagnostics (e.g., Debug, Information).
- [-LogFilePath]: Specifies the path where the log file should be saved.
- [-TeamsEnvironmentName]: Used to specify a custom Microsoft Teams environment if you're working with multiple environments.
- [-UseDeviceAuthentication]: Enables authentication using device code flow instead of user credentials.
- [-WhatIf]: Simulates the cmdlet’s actions without making any actual changes, showing what would happen.
- [-Confirm]: Prompts for confirmation before executing the cmdlet, preventing accidental changes.
Practical Uses of Connect-MicrosoftTeams
The Connect-MicrosoftTeams cmdlet is your entry point for managing Microsoft Teams with PowerShell.
For instance, you can use it to quickly authenticate and connect to a specific tenant to configure Teams settings, retrieve detailed reports on user activity or manage Teams policies and configurations across multiple environments.
It's also useful for troubleshooting, as it can log actions and errors, helping admins quickly resolve issues.
What You Need to Use Connect-MicrosoftTeams in PowerShell
To use the Connect-MicrosoftTeams cmdlet, you need a few prerequisites to ensure a smooth connection to Microsoft Teams via PowerShell. Here's what you'll need:
- Microsoft Teams PowerShell Module: First, ensure that you have the MicrosoftTeams PowerShell module installed. This module is crucial as it contains all the cmdlets necessary to interact with Microsoft Teams from a PowerShell session.
- Azure Active Directory (AAD) Account: You need a valid Azure Active Directory (AAD) account, either a Microsoft account or an organizational account. This is the account that will authenticate and grant you access to Microsoft Teams.
- Tenant ID: You will also need the Tenant ID of your Microsoft 365 or Teams environment. This ID uniquely identifies the organization in Microsoft's cloud infrastructure. If you're connecting to your own environment, you should already have this information. For multi-tenant environments, you will need the specific Tenant ID for the Teams service you want to access.
- Credential or Application-Based Authentication: Depending on the security policies of your organization, you may use either personal credentials (username and password) or a service principal with application-based authentication. For personal login, you’ll use the -Credential parameter, whereas for automated access or admin-level operations, you may opt for certificate-based or token-based authentication.
How to Use the Connect-MicrosoftTeams Command in 4 Easy Steps
Now, let’s go through how to use this command.
Step 1: Install the MicrosoftTeams PowerShell Module
Before anything, you need to install the MicrosoftTeams PowerShell module if you haven’t already.
To get started, open PowerShell with administrative privileges and use the following command:
This command installs the module directly from the PowerShell Gallery. After this, you’ll be able to interact with Microsoft Teams using PowerShell.
Step 2: Load the MicrosoftTeams Module
Once the module is installed, the next step is to import it into your PowerShell session. To do this, simply run the following command:
This ensures that the cmdlets within the MicrosoftTeams module are available to you in the current PowerShell session. Without loading the module, you won’t be able to execute any Teams-related commands.
Step 3: Authenticate and Connect to Microsoft Teams with Connect-MicrosoftTeams
Now that the module is loaded, you need to establish a connection to your Microsoft Teams environment. This is where the Connect-MicrosoftTeams cmdlet comes into play. To connect, run the following command:
When you run this command, it will prompt you to log in with your Microsoft account. Enter the credentials associated with your Microsoft Teams account (e.g., user@meetingroom365.com)
If you're working in an environment that requires a specific authentication method (like using a service principal for automated tasks), you can modify this connection process.
You would authenticate using certificates or tokens instead of personal credentials. In that case, the connection command might look like:
Where $myCredential is a previously set up credential object.
Step 4: Verify the Connection
After successfully logging in, you want to ensure that your connection to Microsoft Teams is properly established.
One way to verify the connection is by running a simple cmdlet, such as retrieving information about a Team or checking the status of the Teams service.
For example, you can use the Get-Team cmdlet to list all the Teams in your organization:
If the connection is successful, a list of Teams in your environment will be displayed. This confirms that you're properly authenticated and connected to Microsoft Teams via PowerShell.
If you encounter an error, it may indicate issues with your credentials or the connection process, which you can troubleshoot by checking your login details or network settings. You can also use the Disconnect-MicrosoftTeams cmdlet to end your session.
Streamlining Microsoft Teams with PowerShell
To wrap it up, the Connect-MicrosoftTeams cmdlet is an essential tool for anyone managing Microsoft Teams via PowerShell.
It’s the first step in accessing all of Teams' powerful administrative capabilities. By mastering the usage of this cmdlet, you can automate tasks, manage settings and gain more control over your Teams environment. Whether you're troubleshooting or streamlining your Teams management processes, understanding how to establish a proper connection with Connect-MicrosoftTeams ensures you have a strong foundation for all your PowerShell tasks in Teams.