How to Check Meeting Room Availability in Outlook


Organizing, planning, and controlling resources are key when it comes to scheduling conference rooms in a company.
Setting up a new meeting requires any person to pay attention to the little details, and one of the most important factors to take note of is meeting room availability.
This guide shows you how to check meeting room availability in Outlook within just a few steps.
What is Outlook Scheduling Assistant?
The Outlook Scheduling Assistant is a Microsoft Office 365 feature that automatically selects the best available time for attendees and conference room availability upon a new meeting request.
The Scheduling Assistant works alongside the Room Finder, which is a feature that helps you reserve rooms for meetings based on the group needs.
Since each room has its own calendar, it is possible for the Scheduling Assistant to show room reservation availability, suggested times, and other factors of the rooms before creating new room reservations.
How to Check Meeting Room Availability in Outlook Using Scheduling Assistant
Users can reserve a meeting room in Outlook based on its availability and the schedule of all the attendees.
The process is performed with the help of three important features: Room Finder and Scheduling Assistant. Without further ado, let’s see how to check meeting room availability in Outlook.
Step 1: Open Outlook Calendar
Open Outlook Calendar and log into the platform with your credentials. The Room Finder feature is also available on the Outlook Web App, but for practical purposes, we’ll focus on the desktop version of Outlook Calendar.

Step 2: Create a New Event and Open the Room Finder
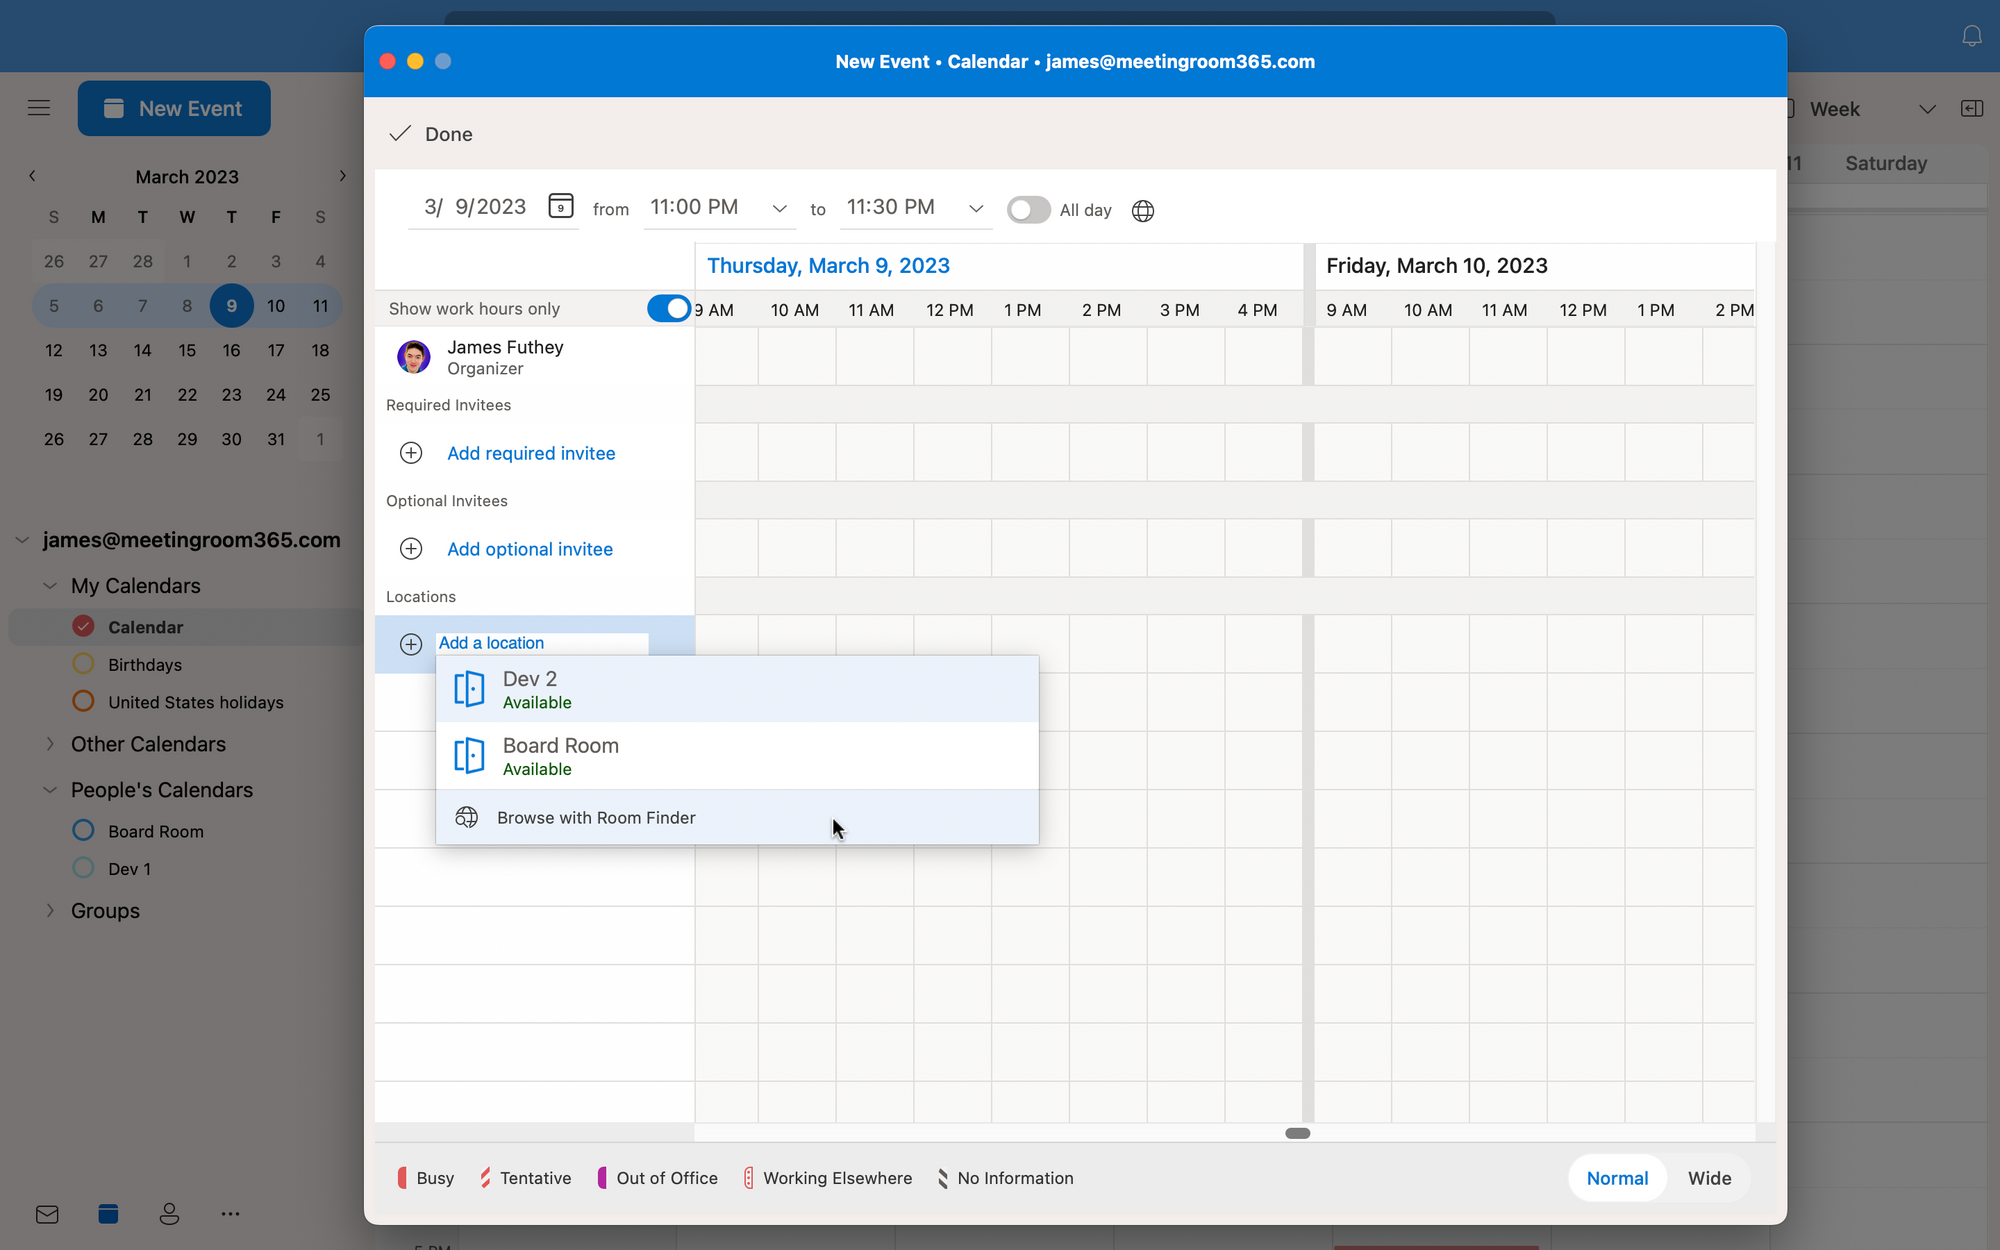
After you open Calendar, click New Event at the top left corner of the screen. Here is where you can schedule meetings. It is possible to set the meeting times, meeting duration, add attendees, set appointment descriptions, start time, and more.
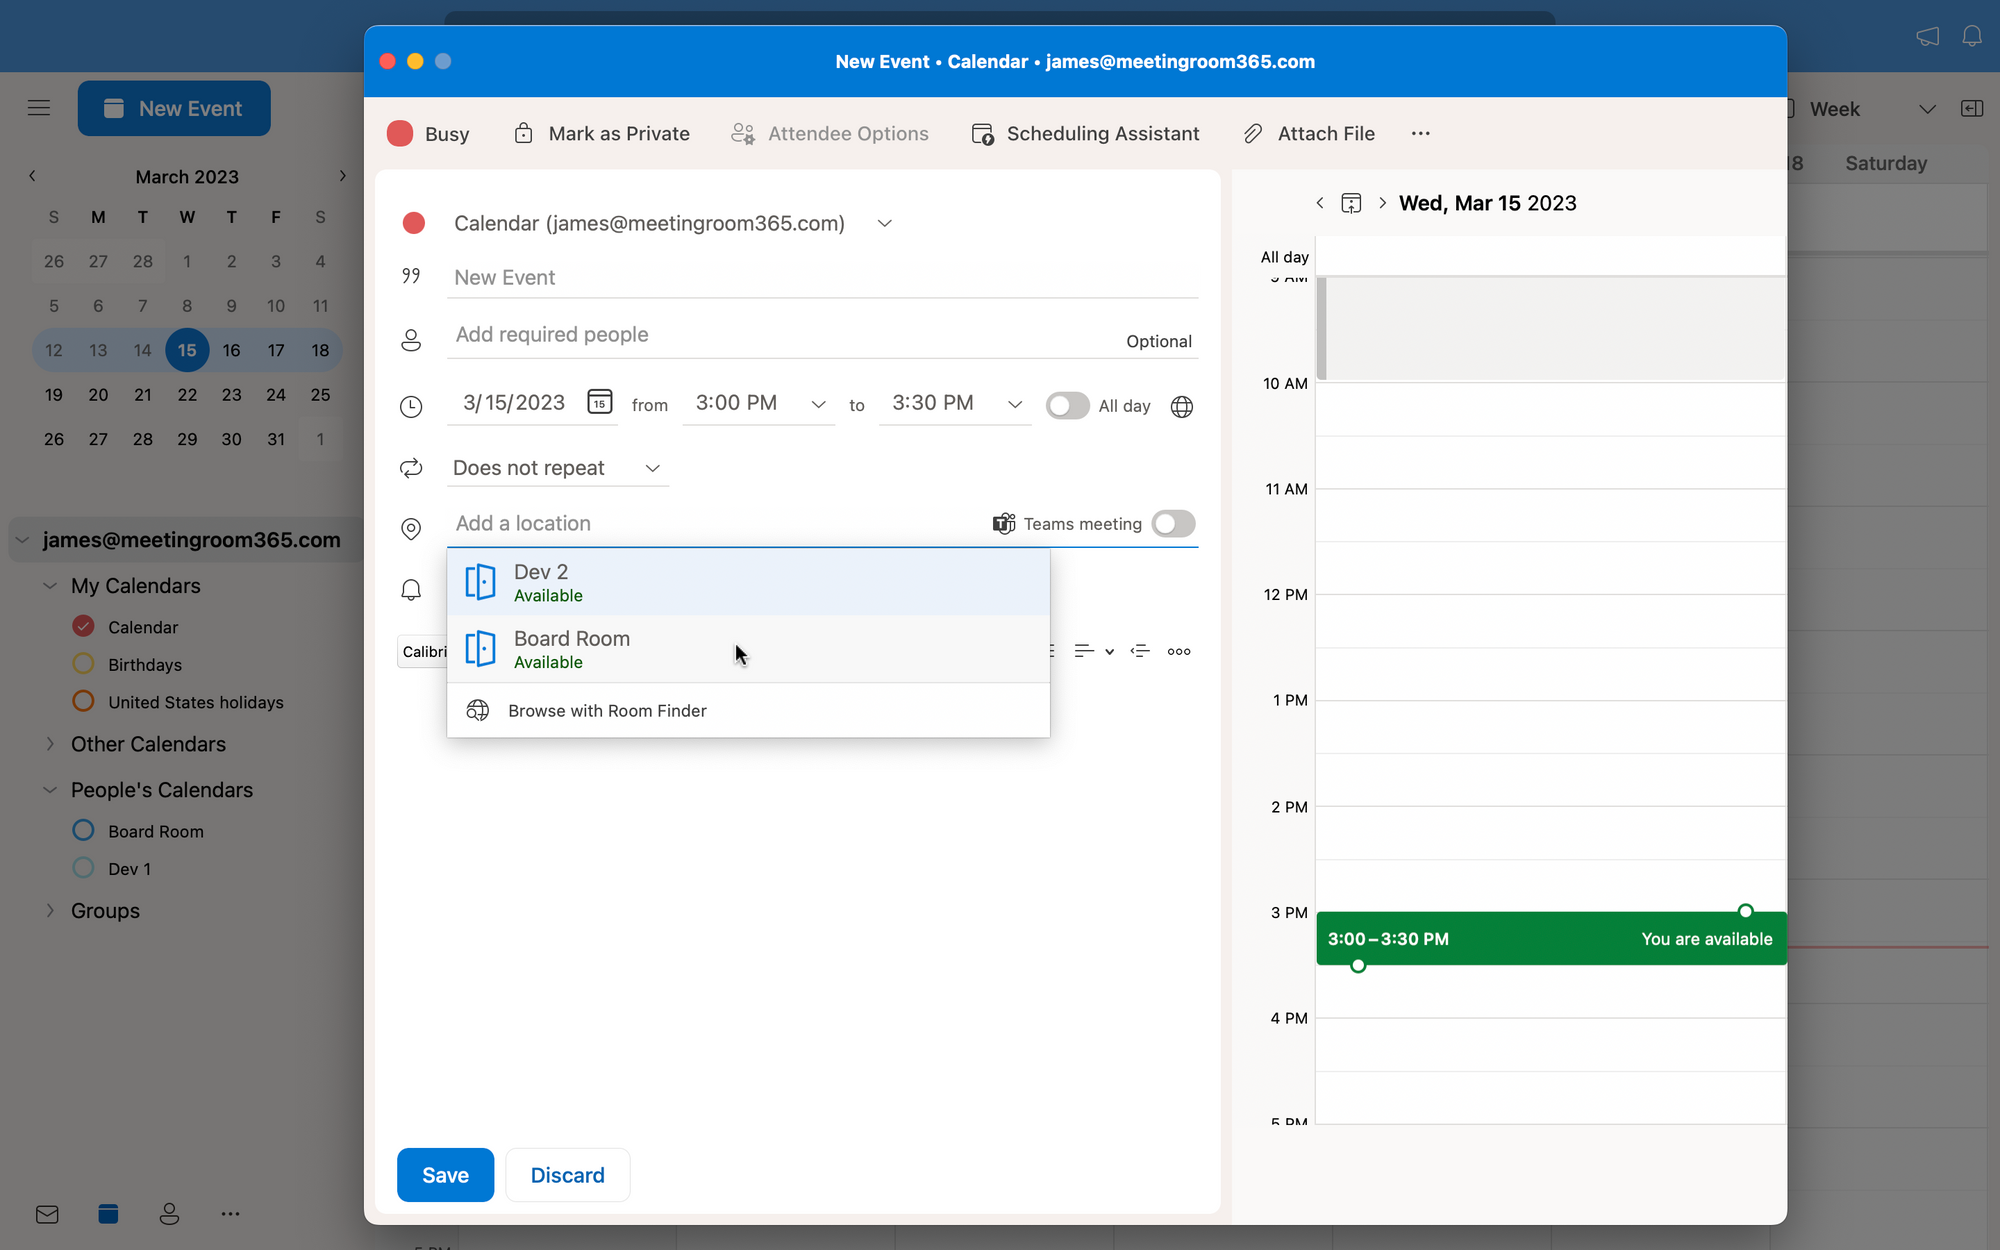
Fill in all the information related to the meeting in this meeting menu, and then search for the “Location” field box - click on it.
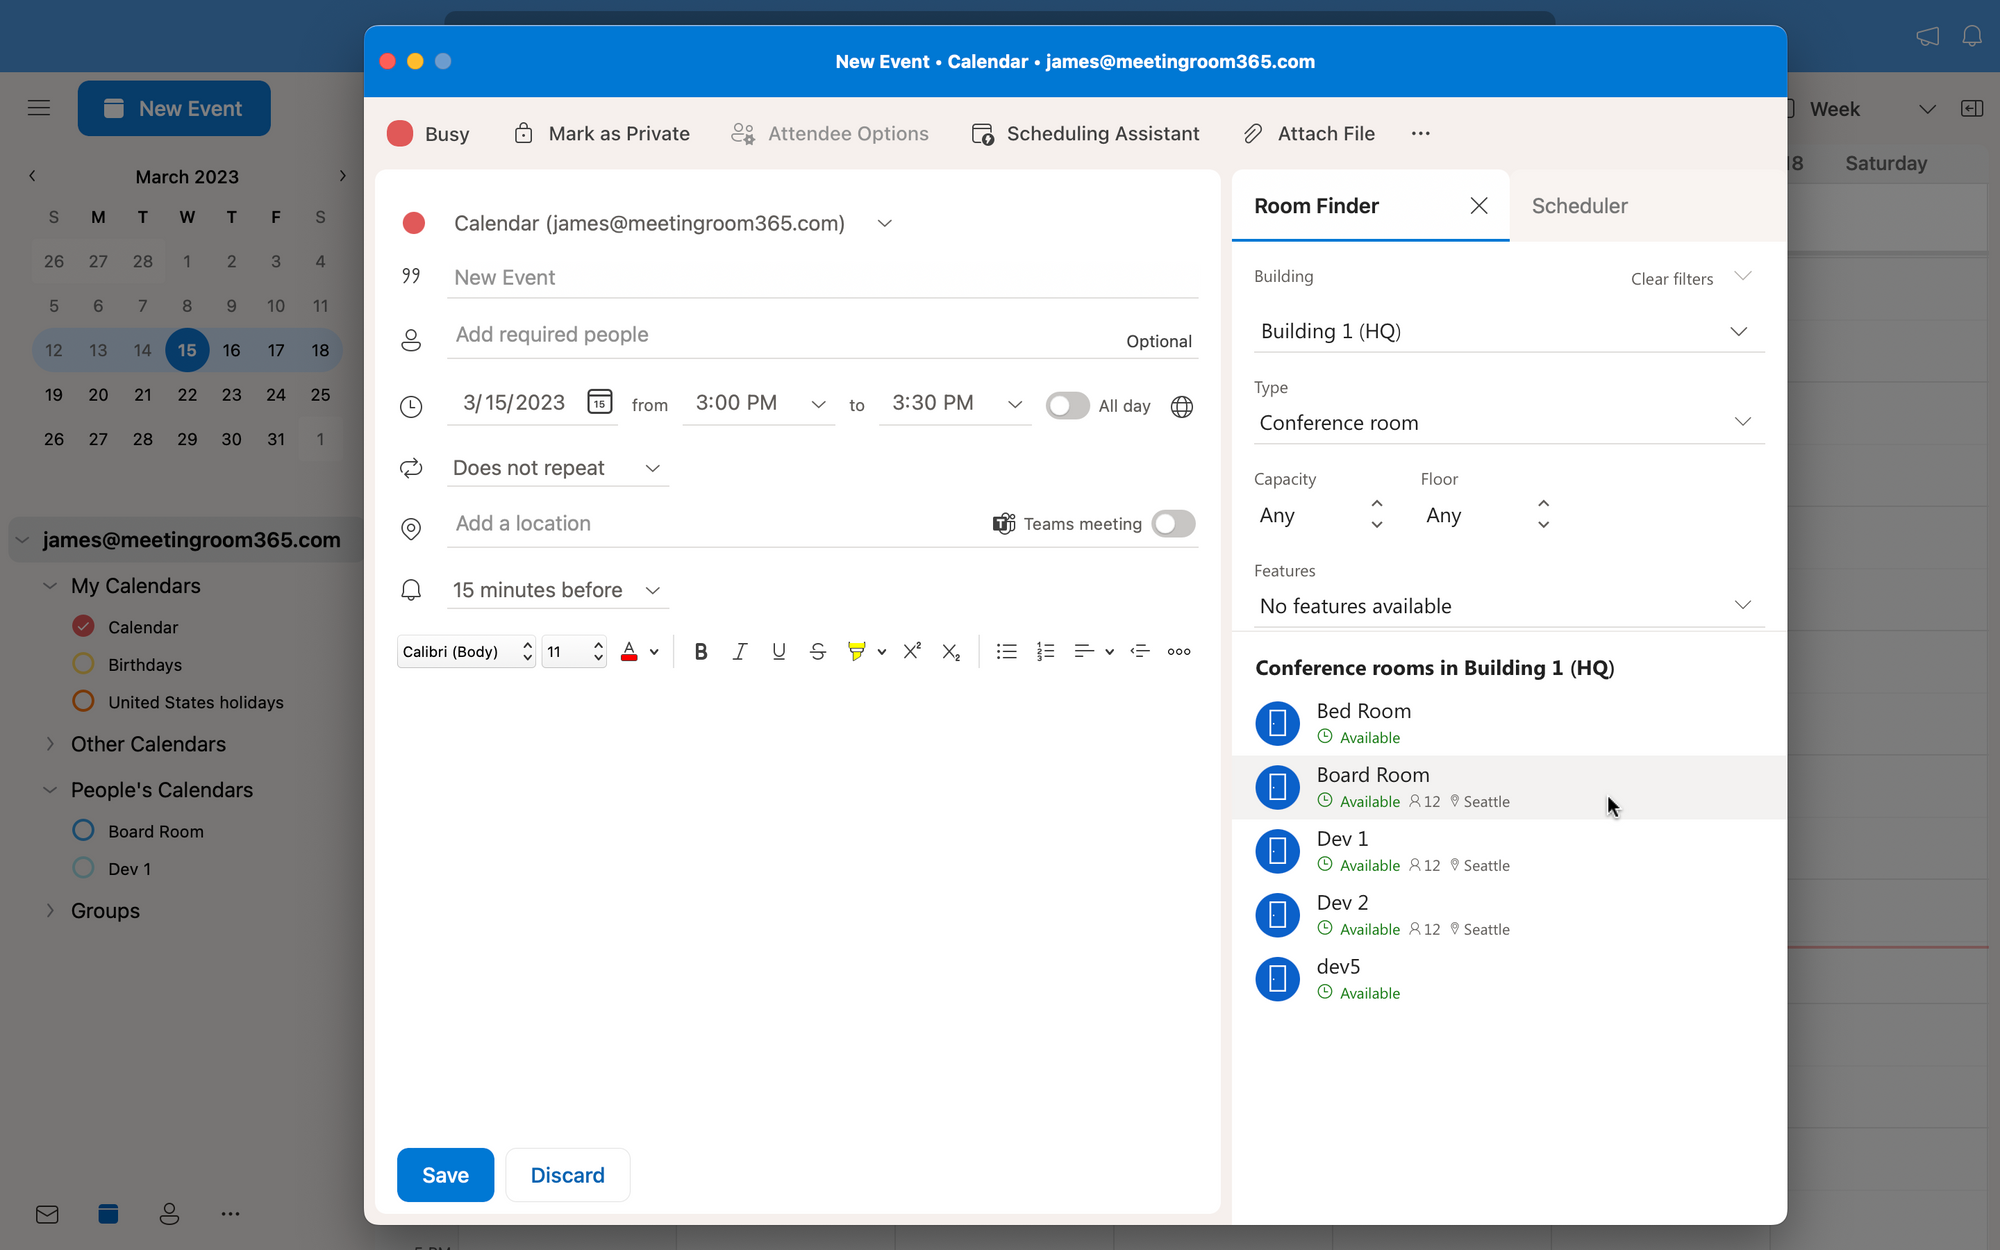
A drop-down menu will open with the suggested rooms and suggested times pane. Click “Browse with Room Finder,” and the Room Finder will open on the right-hand side of the screen.
Step 3: Select Scheduling Assistant and Check Room Schedule Details
Once you open the Room Finder, you’ll be able to filter the desired room by standard and new items, such as building, room features, city, capacity, floor, and more.
The Room Finder will show you a Room List that works with your meeting requests.
This is how options are shown:
- Rooms that appear on the Room List in green color are available and fit the schedules of the required attendees.
- Rooms that do not appear on the Room List are either busy or do not suit the schedules of other attendees.
Click “Add Rooms” to add the rooms that suit you the most, and then click Send to forward the meeting invitation to all persons on the list.
How to Check Meeting Rooms Availability with Admin Access
Admins are able to check the overall calendar view of rooms. If you have Admin Permissions, you can check the individual calendar of the rooms you have been given permission from. This is how you do it.
Step 1: Open Outlook Calendar with Admin Privileges
Open Outlook Calendar and log into the platform with your credentials. You need to have admin privileges.
Step 2: Check “My Calendars” to See Available Room Calendar
Go to “My Calendars” on the home tab of Outlook, and you will see a list of Conference or Meeting Rooms. Click “Rooms,” and check out the schedule of those rooms.
Keep in mind that you can only see the room calendar of the Rooms you have been given permission to.

Step 3: Add Calendar of Other Conference Rooms
In case you want to see the calendar of a room that you still don’t have permission to check, then you can add the calendar of the room list like this:
- Open Outlook Calendar as an admin and select “Add Shared Calendar.”
- Click on “Add from Directory” or “From Room List” and find the room you want to know the schedule from, if available. Otherwise, just search for the room you want to add.
- After that, the new room calendar will be available in the “My Calendar” section. You can drag it to another section if you like. Keep in mind that if you wish to check an in-detail person attendance list, you will need to have full admin permissions.
Wrapping Up: Checking Available Rooms Before Booking Them on Outlook
Saving time while scheduling meetings is necessary to ensure the smoothness and efficiency of meeting processes.
In the future, you can use Scheduling Assistant and Room Finder features to check the availability of conference and meeting rooms before sending meeting requests to your team.