How to Block Meeting Rooms in Outlook


As remote work becomes the norm and online meetings are the default, it's worth considering how we can encourage employees to think beyond scheduling meetings in traditional office spaces when they eventually return to the workplace.
Do you have an issue with users booking rooms they shouldn't be allowed to access?
How to Hide a Resource Mailbox / Meeting Room from users in Outlook
There are multiple options for this. You can hide the resource mailbox, so users are unaware it exists, or you can also enable booking policies which prevent users from booking the room.
Luckily, both can now be accomplished from the Exchange Admin portal, in a couple of clicks.
Prevent Users from finding your room / resource mailbox when using the Room Finder
Do you just need to prevent users from finding a location when searching for a meeting room?
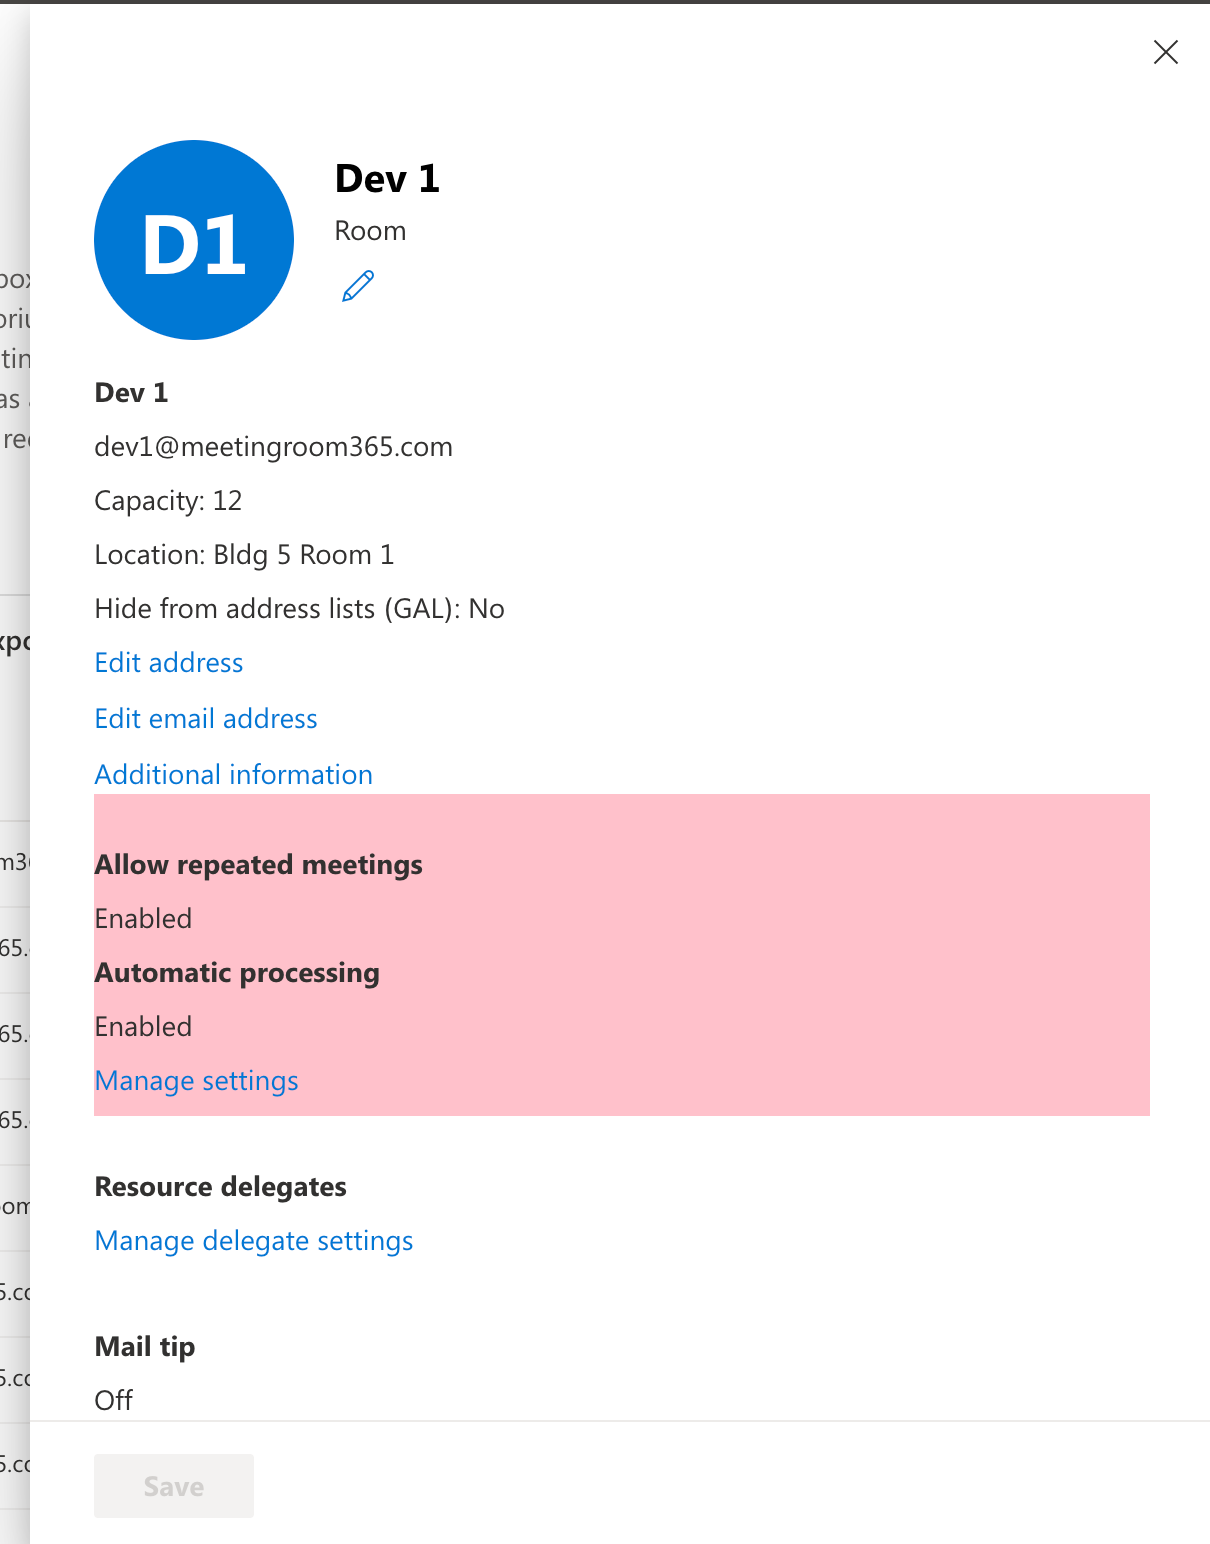
If you scroll all the way to the bottom, you can find this under "General settings" ⮕ "Hide this from the Global Address list".
Once this is enabled, your users will only be able to book a room if they know the email address of the resource, and add it as a location.
Preventing Booking Requests
Or, do you need to limit who can book a specific meeting room, or who can approve requests to book a specific meeting room?
For example, you might have a space you wish to add as a location on Meeting Invites, such as an All-Hands Meeting in your building's event center. But, you don't want to just let anyone book the space for any random meeting!
There are several options in Outlook and Office 365 to limit who can book a resource.
Your options include:
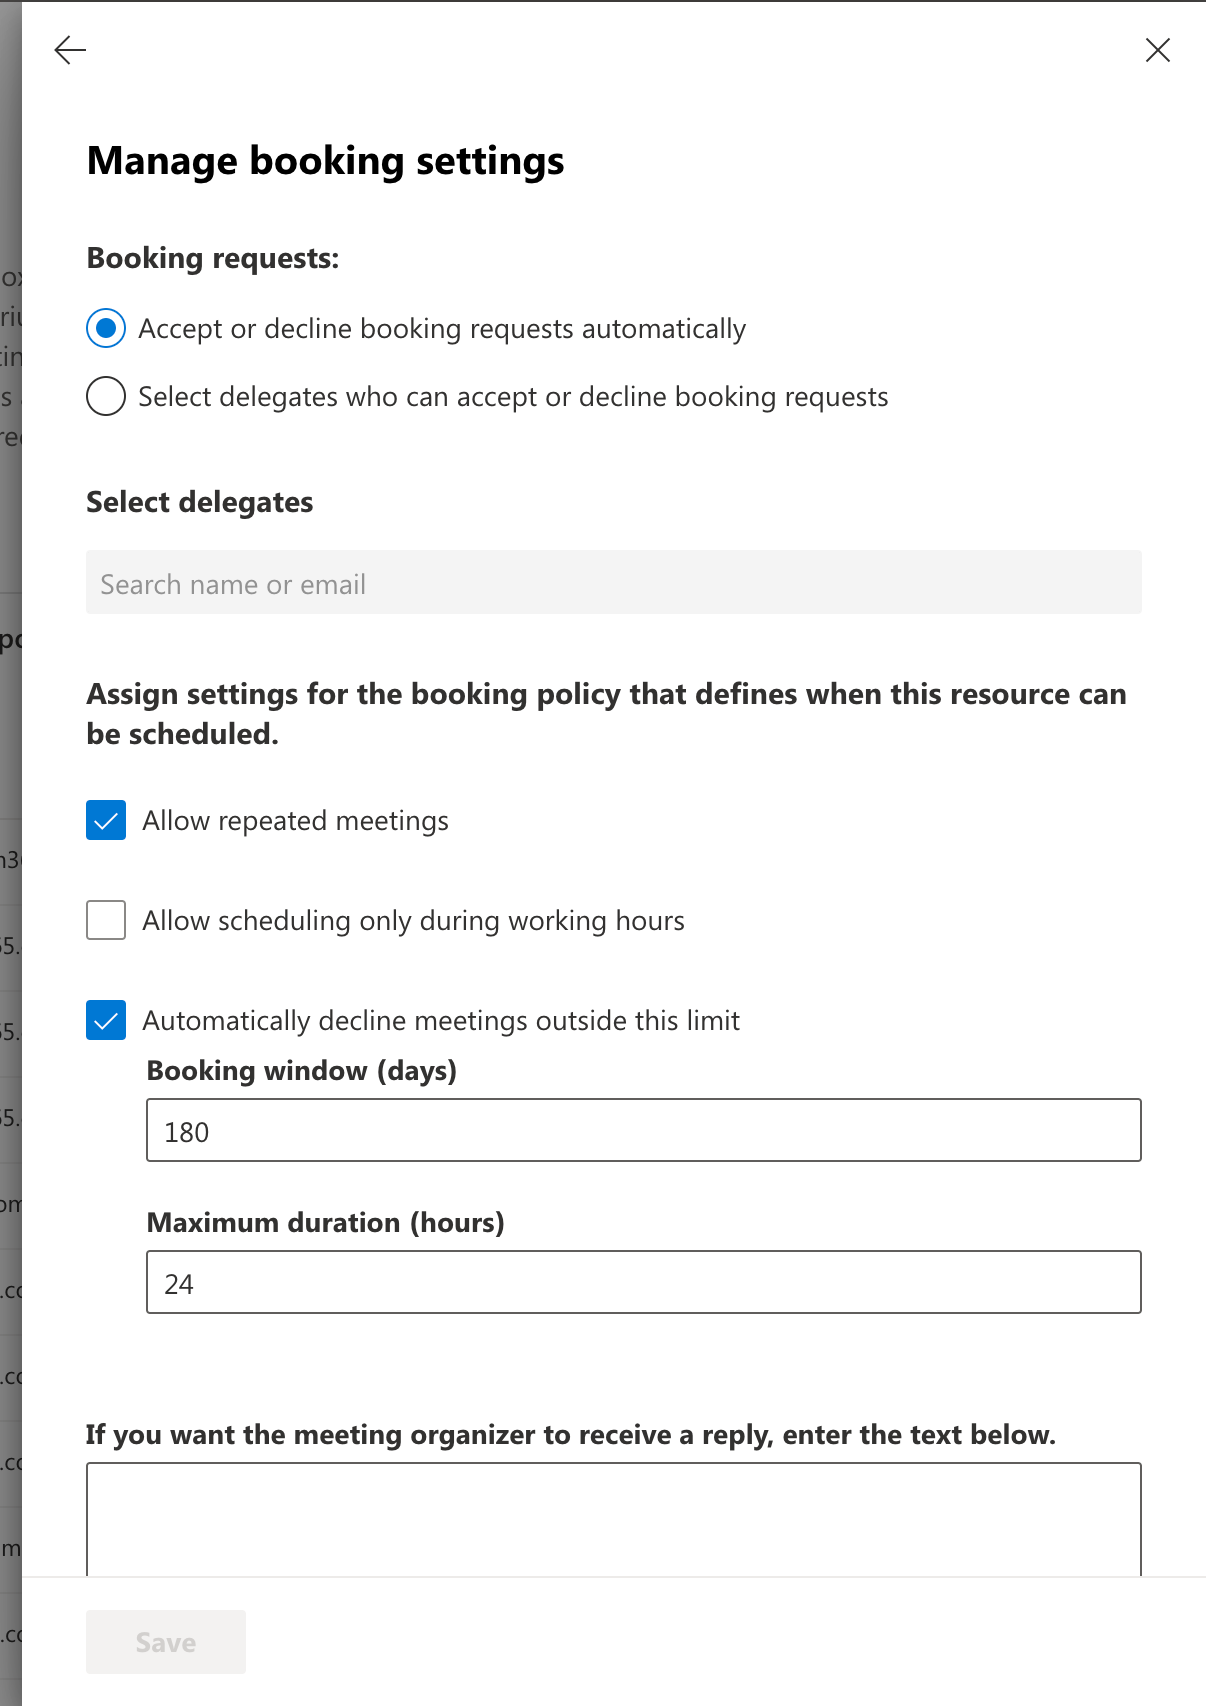
- Allow anyone to book an available resource (First-come, first served)
- Require specific people to approve requests (Anyone can see it as bookable, but an approver must approve the booking request)
- Allow only specific people to book a resource*
- Allow a resource to be booked using the above policies, but limit the bookings to working hours
- Restrict how far in advance a meeting room can be booked
- Restrict how long a room can be booked for
- Reject requests for repeating meetings in a series
With few exceptions for advanced booking scenarios, all of these can be accomplished in the new Exchange Admin Center, in your Office 365 Admin Portal.
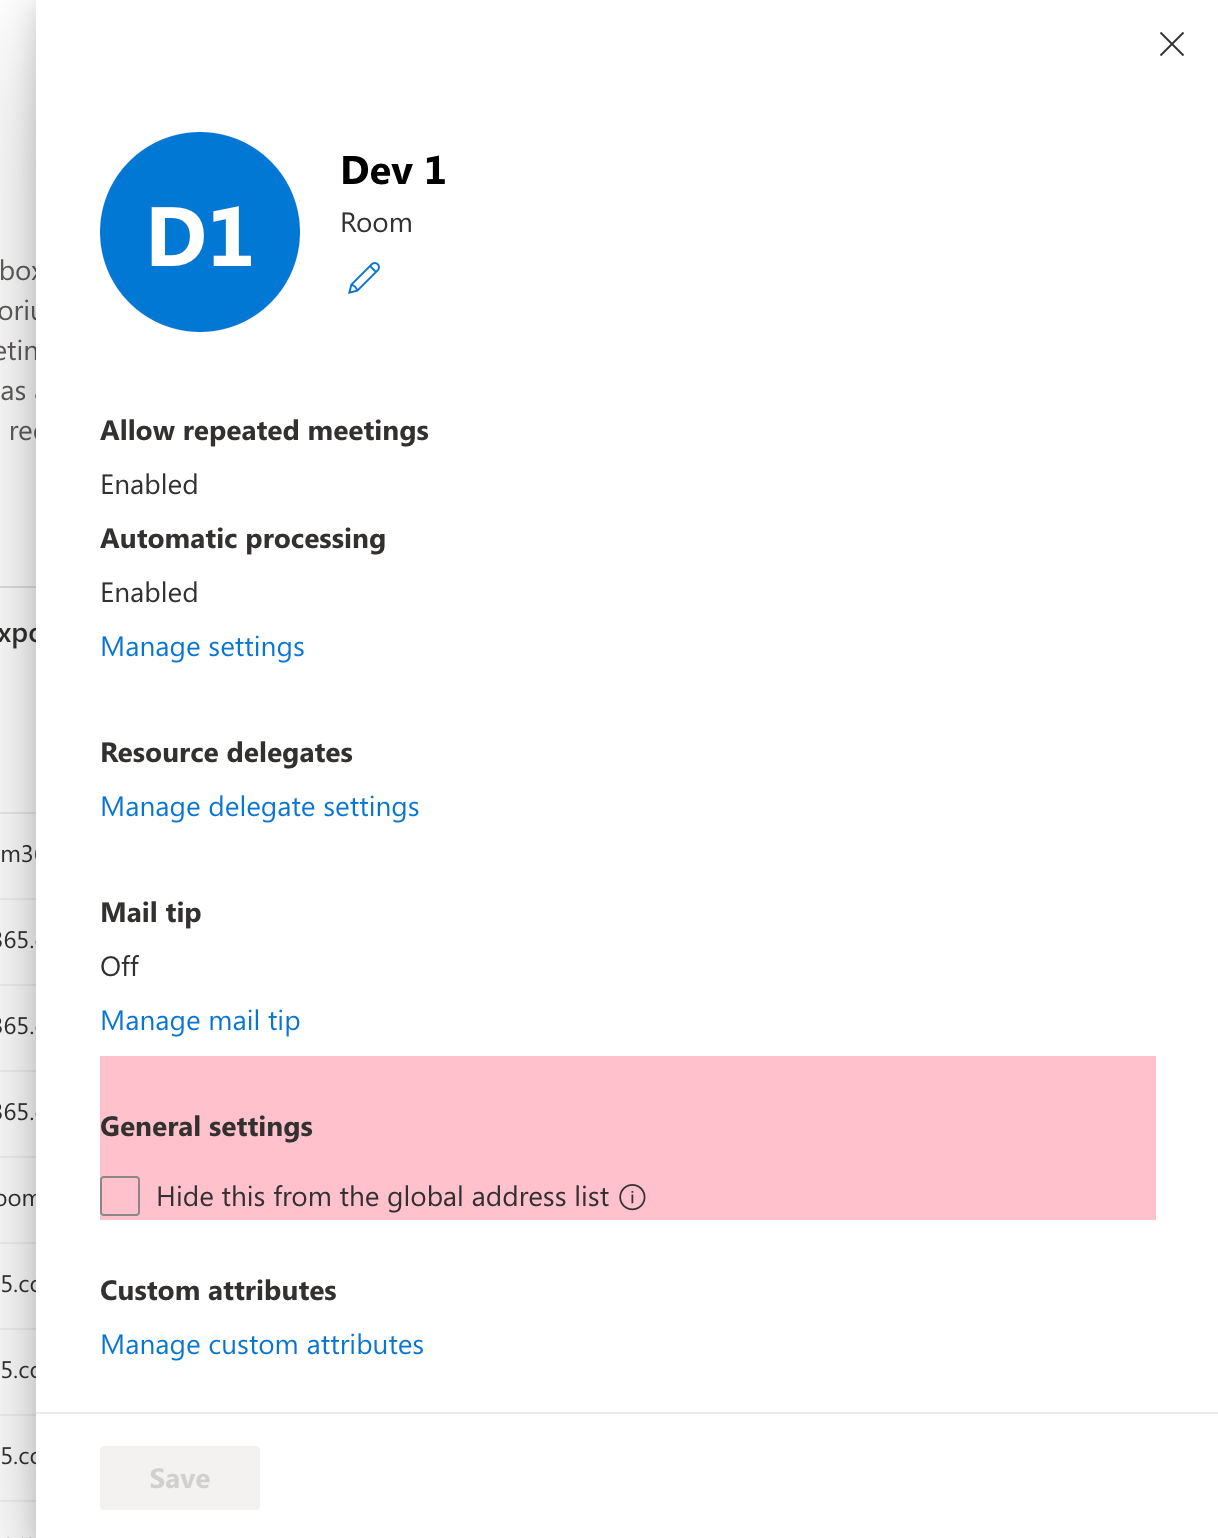
Once you open a Resource Mailbox, find the link to "Manage Settings", under "Automatic processing".
This controls most of the logic behind how your resource mailbox operates.
Here are the default settings:
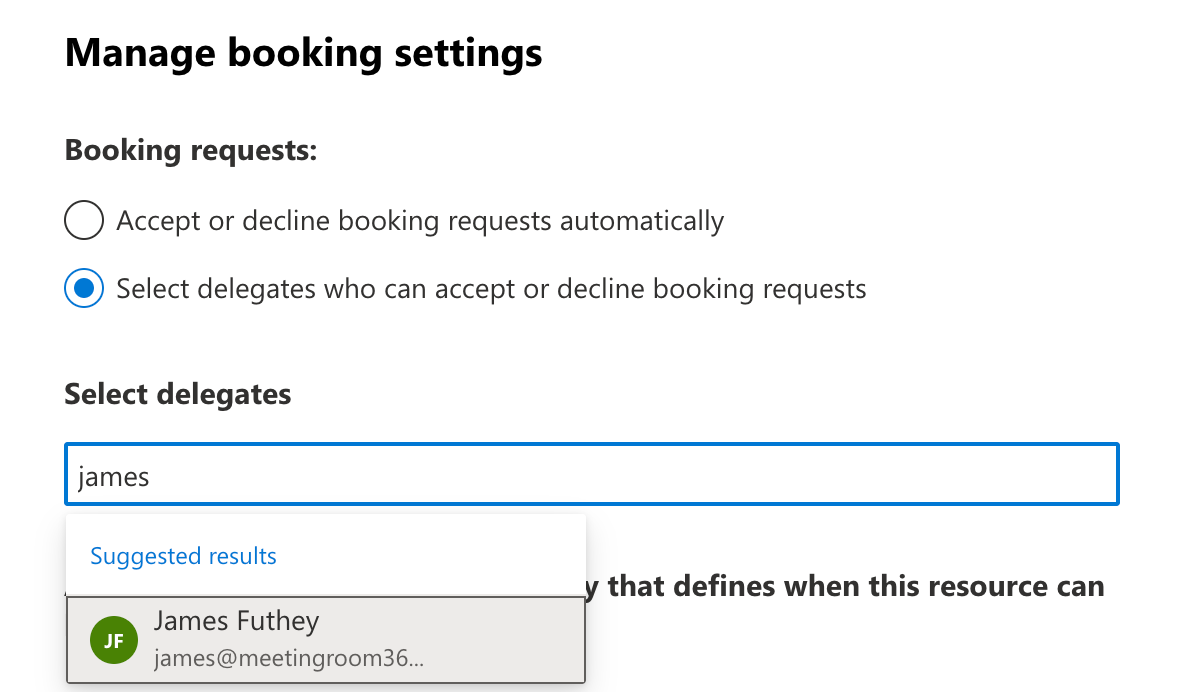
Require specific people to approve requests
In this scenario, anyone can see a meeting room resource as bookable, but an approver must approve the booking request.
Select the option "Select delegates who can accept or decline booking requests". Then, you may add a list of users who are allowed to approve requests to book the room.
Allow only specific people to book a resource
Currently, this can only be accomplished with PowerShell. For most people, the previous scenario accomplishes the same result. But, if you would like to specifically allow only a certain list of individuals to book a resource, you can set that with the following PowerShell command.
First, connect to Exchange PowerShell:
Connect-ExchangeOnline -ShowBanner:$false -DeviceThen, run the following command to configure your Resource Mailbox.
Identity represents your resource mailbox (UPN or email). A list of allow-listed users should follow "-BookInPolicy".
Set-CalendarProcessing -Identity "Car 53" -AutomateProcessing AutoAccept -BookInPolicy "ayla@contoso.com","tony@contoso.com" -AllBookInPolicy $false
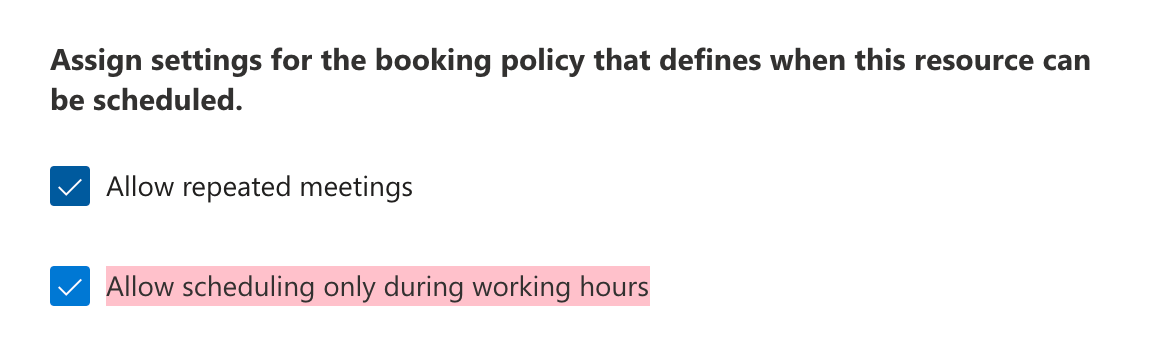
Allow a resource to be booked using the above policies, but limit the bookings to working hours
You can select the higlighted option "Allow scheduling only during working hours" to only allow users to book the resource during "Working Hours".
What are working hours?
By default, work hours are set to between 8:00 AM to 5:00 PM in the time zone of the room resource.
If your room resource is UTC (the default setting for new room resources), this could be a headache. If you wish to change your resource mailbox's work hours, you will need to run the following PowerShell commands:
First, connect to Exchange PowerShell:
Connect-ExchangeOnline -ShowBanner:$false -DeviceThen run the following:
Set-MailboxCalendarConfiguration -Identity "meetingroom@domain.com" -WorkingHoursStartTime 07:00:00

Set-MailboxCalendarConfiguration -Identity "meetingroom@domain.com" -WorkingHoursEndTime 19:00:00
If you need to change the timezone, you can simply sign in to Outlook as the resource mailbox, and perform the action as if you were a normal mailbox user, in Account Settings.
Alternatively, with PowerShell:
Set-MailboxCalendarConfiguration -Identity peter@contoso.com -WorkingHoursTimeZone "Pacific Standard Time"
You can read more, here: https://learn.microsoft.com/en-us/powershell/module/exchange/set-mailboxcalendarconfiguration?view=exchange-ps#example-2
Restrict how far in advance a meeting room can be booked
You can further restrict each resource to only allow bookings to be made so many days in advance. By default, this is 180 days (6 months). But, you can adjust this from the same Booking Settings pane, by changing the "Booking window (days)".
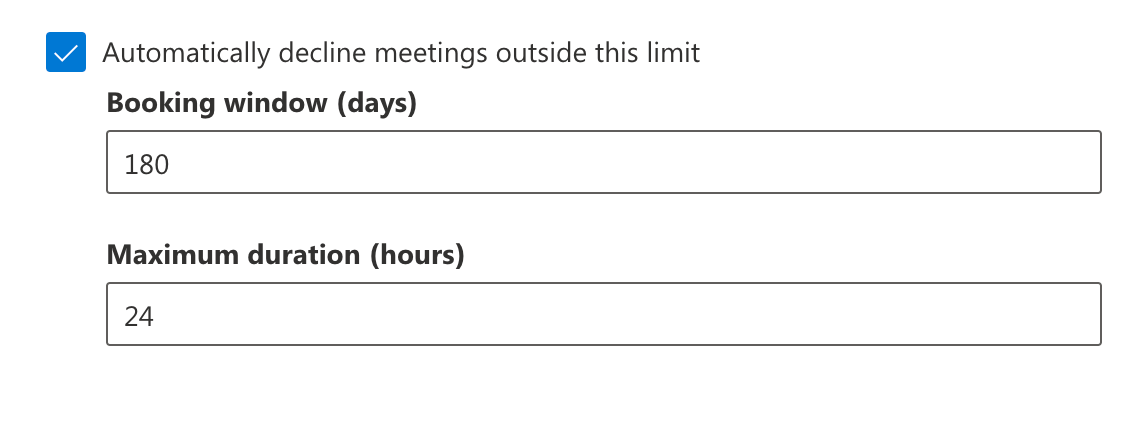
Additonally, you can configure the maximum length of each meeting, by setting a "Maximum duration (hours)".
Reject requests for repeating meetings in a series
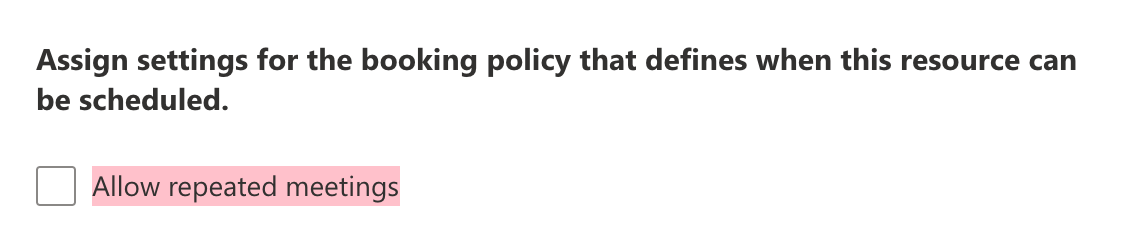
You can reject requests for repeating meetings in a series by unchecking the box labelled: "Allow repeated meetings":